Этот дневик я перестала вести очень давно. Единственные обновления - это автоматический перепост с моего блога,
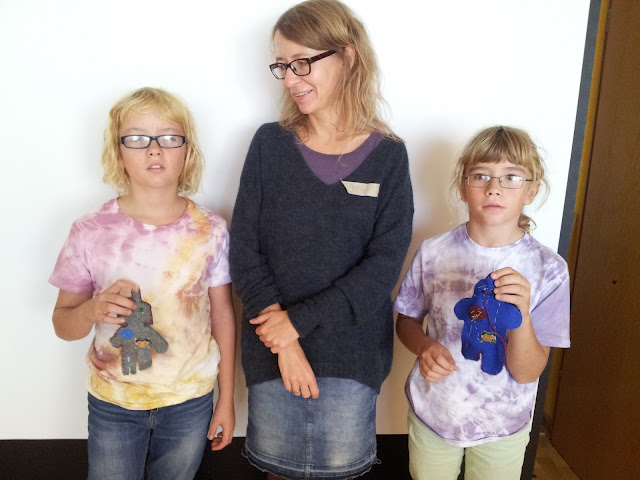
где я пишу о профессиональной части своей жизни: о проектах, выставках, фестивалях, воркшопах и преподаванию
в области медиа искусства, мягкой электроники и интерактивной илюстрации.


Блог | Портфолио

Ещё я веду блог о необычных мероприятиях в Мюнхене с кратким еженедельным обзором. Для тех кому часто
хочется чего-то новенького в городе, но нет времени или возможности выискивать.

URL
I've conducted the following Piano-Shirt workshop for a Nerd Rider event in February. I am  also going to incorporate it a Soft Synth workshop it in September in the Victoria and Albert Museum London, which I'm gonna be leading together with my beloved Emilie Giles!

 Below is a short step-by-step tutorial explaining how to make your own piano-shirt. You will need:

- LilyPad SimpleSnap with lithium battery
- Speaker  8 Ohm
- sewable LED
- conductive thread
- conductive fabric
- normal thread
- metal poppers with holes, 9mm
- double-sided Bondaweb (Ger: B


@темы: Workshop, Teaching, physical computing, soft circuit, wearables, etextiles, capacitive sensing


During the last week of February I was teaching a seminar on wearable technology and education for the third time in a row. This course was a collaboration with Dr. Karin Guminski and Michael Dietrich from SPIELkultur, and Simone Damm was assisting us this year.
All pictures on this page are courtesy of the seminar participants or Anna Blumenkranz

We had an intense week, during which the students had to come up with a workshop idea and produce it: acquire all necessary materials and tools, make an instruction, and after assessing the workload for their target group pre-produce different parts and steps. The next week after the course we went into a school and conducted these workshops with the 5th and 7th grade kids during two afternoons.

One of the challenges this year was having the double amount of students on the course: 24 instead of 12... And another trouble was that I had a flu and completely lost my voice on the second day. Which is not the most convenient thing for a teacher. On the last day of the course, my co-teachers had to act as my voice and read or say out loud what I was meaning to tell everyone in the classroom. Human amplifiers :)


On the technical side, this year I've introduces the students to ATTiny85, as I wanted them work with sound. ATTinys are little micro-controllers, which only cost 1,50? in the eHaJo-shop! A great price for a computer. Similar to an arduino, you can address different pins through code, and attach sensors and actuators to them. Here is what we were doing during the first one and a half days:

STEP1: I've used Arduino Uno to programme the ATTinys (thanks to Hannah Perner-Wilson for a fantastic tutorial). I've used the following code for the Super Mario tune, and this one for the Star Wars tune, and adjusted both slightly.

STEP2: I've made the following swatch to demonstrate the circuit. I intentionally left it as basic as possible, as I didn't want to influence the students' future designs in any way. The circuit uses a 3V battery as a power source, the ATTiny chip soldered onto a piece of stripboard to control everything, a piezo for the buzzing audio output and a standard LED for the light, and two popper switches to open the circuit.


I was very pleased with some of the students' ideas and designs, which extended my circuit and incorporated it in various designs, making them attractive for 10-12-year-olds! There were sock puppets, Minion smartphone pockets with stretch sensors, school book covers with owls, bags with printed tape recorders to switch on and Super Mario mushrooms


@темы: Workshop, Teaching, LMU, physical computing, soft circuit, wearables, etextiles, tutorial

Two days ago I've written about an exhibition about Glitch Art. So it seems only logical, that while I was working on a business card for my sister-in-law yesterday, her Majesty Glitch decided to pay me a visit. She sneaked into my Photoshop, and created business cards of her own... How dare I even think of a dull white background?! So, below are some pictures designed by me us.

My beautiful sister-in-law is a professional singer and teacher. You can hire her for concerts or learn to sing from her!  Oh, and in case you are wondering why all those cherries: Vishnevska reminds of vishnja (вишня), which means cherry in Russian.


@темы: Illustration, Business Card, Glitch Art, Design, Graphic Design


 Last December I was invited to make an opening speech for the Glitch Art exhibition of Rosa Menkman and Nick Briz at Europ


@темы: Exhibition, Talk, Media Art, Glitch Art, Public Event, Software Art, Arts


photo by FormatD
End of February I've been invited to lead a whole-day event on wearables as part of the Nerd Rider event series. Prior to the workshop I gave a one-hour lecture on the history of e-textiles, with insights into various political and social arts projects in this realm. Afterwards the participants had a technical introduction into Arduino Lilypad microcontroller and its programming. And then they went on to design and sew their very own T-Shirt piano.

photo by FormatD
photo by FormatD
photo by FormatD
I loved doing a whole-day workshop, as you can squeeze in very diverse input. Although the time never seems to be sufficient, and I wish we had a whole week together. And I thoroughly enjoyed the workshop participants, their contagious enthusiasm, and their various skills and backgrounds ranging from textile designers for BMW and space engineers to ambitious high-school grads.


A huge thank you to the organizers - Format D, who took over the whole event management and materials, registration, space set-up, and, and and. They had to do some late-night shifts to make this event happen. Thanks to Christian, Benno & Catherina!

photo by FormatD


@темы: Workshop, Teaching, Geekery, Media Art, physical computing, soft circuit, wearables, etextiles, maker culture

17:36

Solar Hood

Initially I wanted to build a flexible solar phone charger, to roll it out and attach to the top of your backpack and charge your phone on the go with green energy. But then I considered the costs and the challenges, and went for a playful option.

So here is a brief tutorial on how to make your own solar hood, or whatever you want to attach it to.

Collect your Materials.
You will need:

- solar motor
- solar cell 
- 3V coin battery
- battery holder
- conductive fabric
- conductive thread
- velcro
- fusible interfacing (in German: Vliseline. A double-sided sticky material for ironing two pieces of fabrics onto each other)
- something light like feather or small leaves
- felt


STEP 1: Plan your circuit. Position your motor, battery, solar cell and velcro switches, and draw the connection, so that you're able to switch the energy source.
STEP 2: Make your motor wearable.
Depending on your motor shorten the wires, remove the isolation and form a loop. Solder this wire loop to a metall popper. Repeat for the second piece of wire.

I used a different motor for my circuit, with wires thick and stable enough to be sewn directly into the fabrics. So I used plastic poppers as an addition, as on the very first picture. Play around with yours!
 Make a felt holder for your motor. If your felt is thin or your motor rather tall, put two layers of felt together. Cut out a form which covers your motor and add two symmetrical "legs" on the bottom.
Secure the two layers with pins and cut it out. Then sew the two layers together.


Wrap the felt holder around your motor and secure it with a pin. Take the motor out and sew the holder together. Take conductive thread and sew metal poppers onto the "legs" of your holder.

Attach a feather or anything light with hot glue to the very top of your motor. This way you'll see the movement of your motor immediately. Be careful not to put too much glue, otherwise it will be too heavy for your motor, and it won't rotate.


STEP 3: Make your solar cell wearable. 
Strip the isolation off a piece of wire and form a loop with pliers. Then cut off this piece. Repeat for another three pieces. Then solder two loops onto the plus and minus contacts in the corners. And glue the other two loops with a hot glue gun onto the opposite corners.


STEP 4: Assemble your circuit. 
Now place all your components on your piece of felt according to your circuit plan, and mark their position with a pen.


Draw your circuit connections on a piece of your fusible interfacing, then put it on a piece of conductive fabric. The paper side of it should be facing you.

Note! The lines on the fusible interfacing paper will be mirrored later, so consider this for your circuit.


 Then iron the fabric.


 Cut out your lines.
 Peel the paper off and put your conductive connectors on the felt. Iron them onto it.


 Establish connections to your components by sewing them onto conductive fabric with conductive thread. Make sure your connections are tight enough. Otherwise there will be an unstable contact.


 STEP 5: Make a velcro-switch.
 Sew the bottom-side of velcro onto the end of your battery connection with conductive thread. Make sure to establish a good connection. Do the same for the solar cell connection. Then sew the third bottom part with normal thread, to make an off-mode for your switch.

Sew the other two metal poppers into your circuit for your motor holder. Thread through one of the poppers with conductive thread and stitch through the upper part of velcro, so that it's moveable and long enough to touch each of the three bottom velcro parts.

Now attach your motor holder.


Here are two examples made during the workshop:


This workshop is inspired by Kobakant's Solar T-Shirt, though in the end I chose to simplify the circuit and make it possible to switch between different power options. Also, I'd like to thank Hannes from eHaJo for helping me with electric troubleshooting!

Creative Commons License
Solar Hood by Anna Blumenkranz is licensed under a Creative Commons Attribution-NonCommercial 4.0 International License.
Based on a work at http://www.kobakant.at/DIY/?p=2763.


@темы: motor, Workshop, solar, Teaching, Geekery, soft circuit, wearables, etextiles, tutorial


Last weekend I was leading a new workshop called "Thread the Sunshine In!" at this year's Make Munich. We were integrating a solar motor into a soft circuit, which would run either from a solar cell if the weather allows it, or from a 3V coin cell battery. Everything was sewn onto a piece of felt with velcro or buttons around the corners, so that you could be flexible and attach your solar motor to your hood, backback, shirt or whatever is well exposed to sun beams.


This time the workshop was slightly different for me and for everybody else. We were being filmed by BR for a short video on the TV. Same week before the workshop I've been interviewed in my studio about women and the maker movement. The video is still available here.


This year's Make Munich was huuuge! It moved to Zenithhalle, which is three times as bis as Tonhalle. So there were even more makers, visitors, events, robotic competitions, 3d printers, etc. etc. than previously.

Many thanks to the organisers Martin & Jenny, all the volunteers, and especially a guy from Munich Maker Lab who spontaneously assisted me throughout the whole workshop with soldering, gluing and taking most of the above pictures! Such an amazing support, thank you so so much!


@темы: make, motor, Workshop, Munich, solar, Teaching, Geekery, soft circuit, wearables, etextiles, maker culture, Make Munich

15:51

Musik M

Two weeks ago I held a new wearable workshop at FabLab Munich. The idea is simple: we've been integrating headphones directly into a winter hat. It keeps you warm while you are listening to your favourite tunes.

I had literally only two days prep time, because the little one brought a  nasty stomach bug from the kindergarten... So here is a short tutorial / documentation:


Step1: Take your headphones apart. (You'll need the ones with big speakers, not the ones you push directly into your ears.) If necessary, remove all screws and break off the plastic to free the speakers from the frame. Tape the speakers around the edge to cover up any sharp plastic edges.


Step 2: Integrate speakers into your hat. Make felt pockets to hold your speaker on the inside. If you want to hide the cable as well, cut into the hat (not the head! ;)
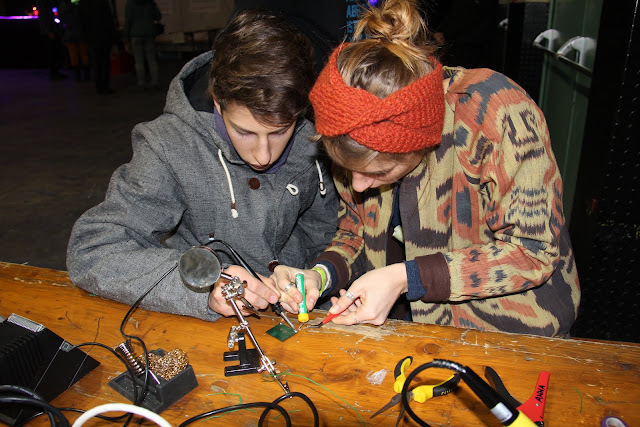
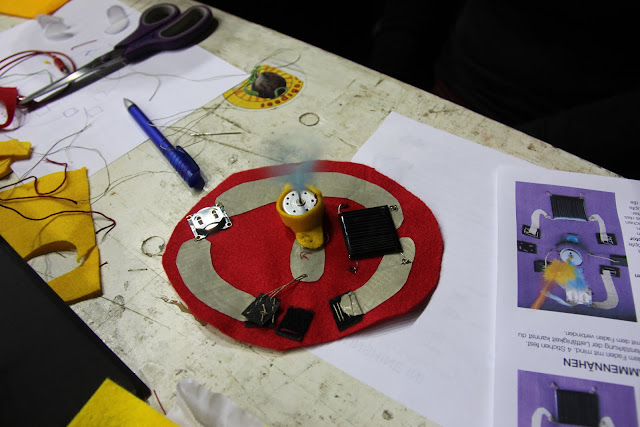
) and thread the cable through the hole. Then stitch everything together again. The cable should run through the back of your hat.


Step 3. Add your design. I've made a fox, hoping that it would make it appealing for kids. And I hid the rest of the cable in a loooong sausage of felt. Voil


@темы: Workshop, Teaching, Media Art, soft circuit, wearables, FabLab

Last weekend I was kindly invited to Heidelberg by my amazing artist friend Anna Donska to conduct two wearable workshops together at Kulturfenster. Anna is offering all sorts of drawing workshops and museum excursions (check out her blog for bright and resourceful pictures). Unfortunately, Anna caught a bad cold, so I ended up doing the second workshop on my own. And I even managed to take the cold home, as a little souvenir from Heidelberg. ))

The first day was dedicated to making Talking T-Shirts (the same technical concept I've used previously for Speaking Bags), for children from age 8. As usual, I offered the participants to create their own soft buttons. However, to my surprise, most of them decided to keep the original "hard" button of the sound module and concentrate on the design of the shirt. And even more surprisingly, despite the absence of real technical challenges, we were struggling with the timing in the end. I must also add that I was very disappointed with the sound modules I ordered for this workshop. I've always had many issues with those, but this time I think half of them stopped working by the end of the workshop, which was rather frustrating... (I think I need eHaJo people make one for my workshops.)


One of my resolutions this year is to become more open source and open data. So here is a list of materials and tools needed, and I also attach my hand-out with the instructions.
Materials: - paper and pencil for sketching and planing
- T-Shirt
- re-recordable sound-module
- thread
- felt and fabric left-overs
- fabric glue or hot glue gun
- conductive thread

Tools:
- needle
- scissors
- cable stripper


Creative Commons License
Speaking Bag by Anna Blumenkranz is licensed under a Creative Commons Attribution-NonCommercial 4.0 International License.

The second workshop, which I ran on my own, was a Soft Robot one, aimed at families. I have never done it for an audience like this before, (though, I used to have totally mixed workshops) and I just loved the concept! There was one father-son team, and two two-kids-one-mum teams. The atmosphere was great and laid-back, and every team finished the electric part by the end. Here is everything we've used in this workshop:


Materials:
- felt
- fiberfill
- two LEDs
- cell coin battery 3V
- battery holder
- conductive thread

Tools:
- needle
- scissors
- pliers 


________________
Possible buttons:

For Velcro Buttons:
- Two pieces of velcro
- conductive thread
- opt: felt

For conductive pompom: 
- thick knitting yarn
- conductive thread
- two round pieces of cardboard with a whole in the middle

For Stroke Sensor:
- felt
- conductive thread


Many thanks to lovely and hospitable Anna, friendly Kulturfenster & Ulla, and beautiful sunny Heidelberg!


Creative Commons License
Soft Robots / Kuschelroboter by Anna Blumenkranz is licensed under a Creative Commons Attribution-NonCommercial 4.0 International License.


@темы: Workshop, Media Art, soft circuit, wearables, Design, Arts

This February I tought a blocked week-long seminar at the LMU, in collaboration with Karin Guminski as well as Michael Dietrich from SPIELkultur. On this course the students were introduced to the basic techniques of wearable electronics. They were then split in three groups. The rest of the time was spent on brainstorming and workshop development, acquisition of materials, planning, designing, etc. On the last day of the seminar we went to Nymphenburger Gymnasien to test out the workshops with the students' of the 10th grade there. It was a very exciting experience for the students on the course, they mastered the whole day brilliantly and enjoyed teaching a lot. Here is a much better report about the seminar by one of my lovely students Teresa Biersack. (Sorry it's in German.) But hopefully it gives you an idea about the whole seminar.


  bn


Thousand thanks to everyone involved! It was a huge fun and worked out really well for all students!


@темы: Workshop, Teaching, LMU, Media Art, wearables

Recently I took part in a group exhibition organised by a Kiev-born artist Natalia Zurakowska, who is my former arts teacher and whom I dearly love. It was a charity exhibition, so as all money from the sold artwork was donated to support the refugees in Ukraine.


For this exhibition I created three embroidered portraits in traditional colours, inspired by Ukrainian fairy tails. A good example for this type of folklore is a tail of the fox, the cat and the cock: "Котик та пiвник", which I used as an audio source for the portrait of the granny. The idea to display e-embroidered artwork this way is borrowed from a Spanish artist Oh!villo, whom I discovered some time ago and whose work I find utterly beautiful and subtle.


Apart from e-embroideries I also exhibited three prints from the previous 100 Word Pilgrimage shows (Croydon in South London, Rotherhithe in East London, and the Munich edition: Kriechbaumhof in Haidhausen).


In the end, we managed to collect a decent sum of money which was given to a very trustful Ukrainian charity organisation. My fox now lives with the amazing Brigitte Yoshiko Pruchnow  who bought it (check out her fantastic work and masterly acrylic water reflections). And I, for my part, was very tempted to buy Natalia's Ukrainian village cat :)

Brigitte's graphic work
Natalia's new Ukrainian-themed paintings

Amazing textile work by Irina Lupyna


@темы: Exhibition, Illustration, Munich, Geekery, Beddow n Battini, soft circuit, Arts

17:12

I feel very honoured to be part of a virtual exhibition space called the Spam Project initiated by Markus Rico and Carolina Romano. It is related to glitch art, digital media art and surveillance.  Supported by my super talented husband we've contributed a text which you can read at the bottom of this post or watch it exhibited in the virtual space here. It's like going to an exhibition but staying at home at the same time! Check it out!


***********

Recent events:
UAMO Festival: a literally underground festival or urban culture. I exhibited my Strait Tablecloth, which I discovered all torn apart and broken on the last day of the show. Which actually means that the resonance was really good, as people were not only actively interacting but were also trying to break free from the restrictions imposed by the installation. Lesson learned: you never know where the artwork is going to take you!

Make Munich: a huge maker fair was a big fun again! This year I was collaborating with eHaJo, who made a special circuit board for my workshop! So this time we made robots which changing smileys. I had participants who came from various cities just to take part in my workshop! And I also had my lovely friend Anna from Athens assisting me, which was a great help!  Read more about the whole event on Hannes's eHaJo blog.

pic by Cut & Tear
pic by Anna Kartasi


Upcoming events:
Next week the 100 Word Pilgrimage Munich is going to London! After a successful exhibition in Munich in May, me and some other Munich artists are paying a visit to our colleagues in London! We are going to explore the hidden gems of London, describe them in words and colours. Stay tuned for updates on our adventures on the island!

Also, at the moment there's a next 100 Word Pilgrimage exhibition in London, at the W3 Gallery. It's called Go West. Pop by if you're around. It features my Rotherhithe illustration.


**************
'I forgot the password and my Doppelg


@темы: Exhibition, Illustration, Workshop, Munich, Media Art, Beddow n Battini, wearables, Arts

I've finally updated my homepage! Check it out!
http://www.annablumenkranz.de/

Critique and suggestions are welcome.


@темы: Media Art, Arts

Just realised I haven't actually posted neither the illustration nor the animation I've made for the last 100 word pilgrimage show. Must have been too destructed by the whole admin and orga work. So here it goes! If you haven't done so yet, you can have a sneak at what other artists have produced on our webpage over here.

This illustration depicts Kriechbaumhof - a wooden hostel for workers from the 19th century, and the history connected to it. (Here's a short article about it with pics.) Also, you should know that I had my prenatal course in this cute house, and lovely Petra, who's written the 100 words about this place, once had her creative writing course there. So all these aspects are part of the story.


@темы: Exhibition, Illustration, Munich, Beddow n Battini, Arts

Last spring I held a one-day workshop in collaboration with a textile artist Stefan Wischnewski. The workshop was supplemental to the exhibition "The Answer of Things" at the city gallery Lothringer 13. It was a fun day of tinkering with kids with an experimental approach to electronics and its strict rules. Definitely a new experience for me!


@темы: Workshop, Munich, Teaching, Geekery, Media Art, soft circuit, wearables

I'm happy to be part of this year's Make Munich again - a super fun hacker & maker festival. (I've written about it last year here, and here's the Christmas edition of the festival.) It will take place from 1st until 2nd November at the Tonhalle.

Some time ago Ruben from the orga team came over to my studio to create the first letter for this year's logo together. The M should symbolise wearable technology - totally my cup of tea. Here's what we came up with within a short time:


@темы: Munich, Geekery, Media Art, wearables

I've been absent from this space for a good reason known to most of my readers, but now a thorough catch up is needed!

Despite working on a very tight schedule, everything was finished just in time for the exhibition.
Prior to the opening there was an article about me and the project in the Sueddeutsche, an interview in BR (Bavarian Radio), a post on Arts in Munich, etc, etc.

Luckily we got some financial support from the city and others, and thus could implement almost all the ideas we had. For instance, we prepared the "pilgrim packages" which contained postcards of all the 21 artworks. These postcards also included our quiz questions around the respective places. The visitors were offered to explore the hidden places of the city for themselves and could find the answers at these specific spots, attached to bicycles.

For more background information about the project and all the artwork created for the project, check out the website I've built shortly after the show: http://100wordpilgrimage-munich.tumblr.com/


The opening night was fabulous! We even had Wumi and Tatiana - Beddow n Battini members who came over from London. And a 8-string guitar virtuoso Alexander Vynograd was a invaluable addition to the evening. I am very grateful to all the Munich artists who participated with their artwork, organisational brilliance and devotion to the project! I was so lucky to have such talented and reliable artists on board! I also want to thank the whole PLATFORM team, who supported us with all possible means, gave us the space for a whole month, with technical, financial and all possible issues.


@темы: Exhibition, Illustration, Munich, Beddow n Battini, Arts

Ever since I've been back to Munich, I wanted to introduce the concept of the 100 Word Pilgrimage exhibitions we've done with Beddow n Battini collective in London. (Here is what I've written about the three previous shows focusing on different parts of London in December 2012, April-May and June 2013.) The concept is very simple and prolific: first the writers embark on a pilgrimage to a specific place or area of the city and write down their impressions in 100 words. Then they pass these writings on to the illustrators, who pursue this narrative with visual means. Finally, the animators combine the writings and illustrations and bring the whole story to life, embedding their own ideas and impressions. During the exhibition visitors can access the animations with their smartphones or tablets, using the augmented reality app Aurasma.

Flyer design: Mirko Kahl, illustration: Rosy Wilson


------------------------------------
And now it's finally official! The opening of the 100 Word Pilgrimage Munich will be on 8 May 2014, 7pm at PLATFORM, Kistlerhofstr. 70 (U3 Aidenbachstr.)! It will run from 9th until 12th May, from 11am until 7pm. (You can sign up for this event on FB.) Throughout the whole exhibition it will be possible to go on a self-initiated pilgrimage to the places we picked for our artwork, solve some riddles on the way there and discover the city from a new angle.  During the weekend we'll be also offering artists & writers talks at their spots in the city. Watch out for further details coming soon!

What's new about the Munich edition of the project, is that we added an international flavour to it: I was very lucky to gather a lovely and very talented team of Munich artists from different areas and backgrounds. I also invited the Beddow n Battini artists from London who came down to Munich last week to develop new artwork in collaboration with the local team of artists and writers.

Wumi & Tyutchev
Ice cream and sun at Wei


@темы: Exhibition, Illustration, Munich, Beddow n Battini, Arts

This is a workshop I've been doing at the Situlischule in North Munich end of February, assisted by the super talented Fanny. It was commissioned by Stadtbibliothek Milbertshofen as part of their programme "Echt Sch


@темы: Workshop, Munich, Teaching, Media Art, soft circuit, wearables

So as I already mentioned in the previous post I had to take a cab in London at 3am, in order to get the train to Gatwick, to get the 6.20am flight to Munich, take the S-Bahn from the airport, run into my place and grab everything for the workshop, rush after the next S-Bahn to Pullach to get to the workshop on time :) 

Set in a beautiful castle, my maKey maKey workshop was part of the New Media conference for  Kreisjugendring employees (a huge pedagogical organisation in Munich) on 21 February.


To get started after an introduction to technical maKey maKey details, we constructed a playground on the floor for a simple colour game in Scratch, in which participants were making one of the electrical connections by stepping with their bare feet on a piece of foil, and the other by touching their team partner. We had lots of fun!

The next task for the young teachers was to design an interactive environment, which would involve the objects in the room. It was inspired by this amazing HacKIDemia musical room project in Austin. One of the teams wired up the whole buffet Alice-in-Wonderland-style, making touch-sensitive giggling fruits, musical coffee cups and other drinks, etc. The second team adjusted some of the audience's chairs, but adding buttons and foil to it, so that the chairs would laugh out loud when touched. These creations caused a big confusion, once everybody gathered in the hall, coming back from all the other workshops to share their experiences.


In the end every workshop group presented their results to each other. So my group decided to let everybody play the bare-feet colour game once again ))

It was a very joyful workshop with inspiring participants, and despite a sleepless night I did not feel tired at all. Great fun! Thank you so much Alice for organising the whole day, for inviting me and for taking part yourself as well!


@темы: Workshop, Munich, Teaching, Geekery, Media Art